
Most Amazon sellers assume that gorgeous product images require a huge budget.
Here’s the truth:
It’s not about spending more. It’s about working smarter.
With the right strategy, you can create professional-looking images that boost clicks, conversions, and sales, without emptying your wallet.
In this guide, I’ll explain how you can do that. But first, let’s quickly cover the Amazon product image guidelines so you’re set up for success.
Want to know the secret to creating perfect Amazon product images without blowing your budget?
Many sellers believe that eye-catching product photos require a hefty investment.
But the truth is, it’s all about having the right strategy.
You don’t need a studio-level budget to produce high-quality visuals. What truly makes the difference is how you show your product, focusing on strong lighting, clean backgrounds, and angles that highlight key features. When done right, your images can capture attention, build trust, and increase conversions.
In our latest blog, we share practical, cost-effective tips to help you elevate your product images without overspending. These insights are designed to help you produce visuals that not only meet Amazon’s standards but also speak directly to your target audience.
Before diving into the strategies, let’s take a quick look at Amazon’s product image guidelines, because understanding the rules is the first step toward creating content that performs.
Quick guide
Why are Amazon product images important?
They build trust and influence buying decisions.
You don’t need a large budget for great photos.
Smart planning can deliver pro-quality results affordably.
Work with pros wisely.
Hire Amazon image editing services, but have a clear vision to save time and money.
Use basic props
Keep it simple to highlight product use effectively.
Highlight your main image.
It’s the first thing shoppers see, make it count.
DIY secondary images
Capture features and usage with basic tools.
Improve existing visuals
Re-edit or repurpose old images for better results.
Add lifestyle photos
Show real-world use to help buyers connect.
Be specific with your photographer.
Give clear direction to get exactly what you need.
What top Amazon sellers do differently
- They perfect their main image
- They test and improve images regularly
- They ensure images look good on mobile
- They create sharp 3D renderings
- They collaborate with professionals
Amazon Product Image Guidelines
- Format: JPEG (.jpg), TIFF (.tif), PNG (.png), or GIF (.gif)
- Size: 500–10,000 px on the longest side
- Quality: Clear, sharp, no pixelation or jagged edges
- Accuracy: The Product shown must match the title and description
- Main image: Pure white background, product fills ~85% of frame, no text, logos, watermarks, or extra graphics
- No Amazon logos or badges: No “Amazon’s Choice,” “Best Seller,” etc.
- Clothing rules: Adult clothing on standing models; kids’ clothing flat without models
Following these rules is non-negotiable. Break them, and your images could get suppressed.
Why is investing in Amazon product images important?
Think your photos don’t make or break your sales? Think again.
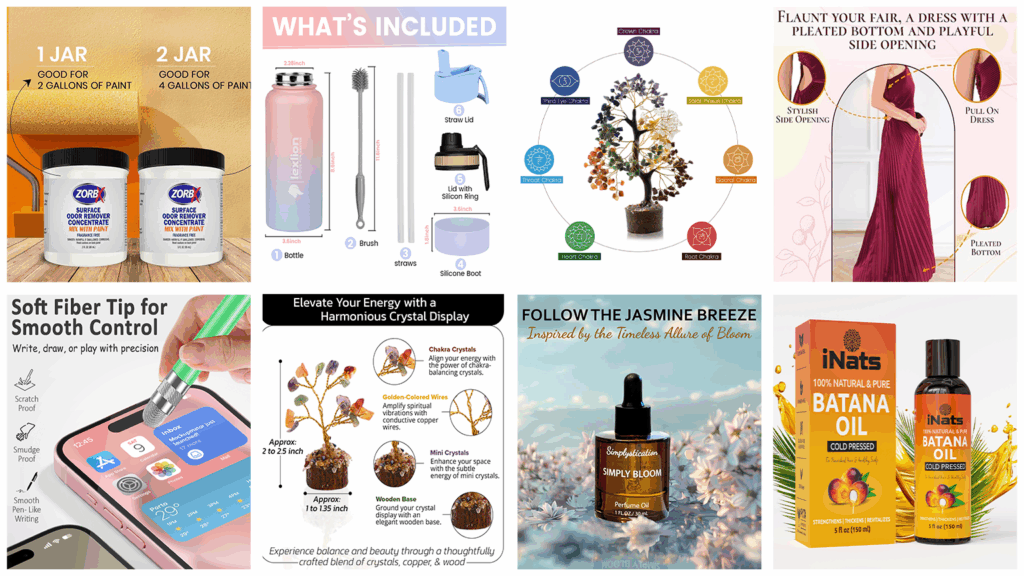
Here’s what’s at stake:
1. First impressions matter → Your image is the first thing shoppers see. It’s what stops them mid-scroll.
2. Trust is visual → Blurry, dark, or amateur photos instantly erode trust.
3. Better images = more clicks → High-quality Amazon Product Images boost click-through rates.
4. Images tell your story → Amazon Product Infographic or lifestyle images help customers imagine your product in their lives.
5. They affect your ranking → Amazon’s algorithm favors listings with higher CTR and conversions. Good images help both.
6. Emotional impact matters → A beautiful image doesn’t just inform—it makes people feel something. That’s powerful.
But you don’t need a big budget to create great images
You don’t need a Hollywood budget. You just need smart priorities.
Here’s your playbook:
1. Focus on Your Hero Image
The main image is your most important asset.
- Invest in a pro photographer for this shot.
- Make sure it’s sharp, well-lit, and represents your product perfectly.
- It should stand out in search results and communicate value instantly.
2. Work With a Pro, But Be Selective
You don’t need a full shoot for every image.
- Hire a pro for key shots (main image + 2–3 lifestyle shots).
- For secondary angles or simple shots, DIY under their guidance.
- Ask the photographer for tips on lighting, angles, and props you can replicate at home.
3. Use Simple, Smart Props
Skip expensive set design.
- Everyday items can elevate your shot: a cozy throw, a steaming mug, a few books.
- Keep it clean, don’t clutter the frame.
4. DIY Support Images
Get creative.
- Shoot simple detail shots or alternative angles yourself.
- Use natural light, a basic lightbox, or even a smartphone with a decent camera.
5. Optimize Existing Amazon Images
Don’t discard what you already have.
- A little professional retouching, like color correction or background cleanup, can transform average images into great ones at a fraction of the cost of reshooting.
6. Invest in a Few Lifestyle Shots
Lifestyle images sell a dream, not just a product.
- You don’t need a dozen, just a few powerful shots showing your product in use.

- These help customers imagine how it fits into their lives.
7. Communicate Clearly With Your Photographer
Save time, money, and headaches.
- Provide a clear shot list.
- Share examples of what you like.
- Be upfront about budget and priorities.
What are the top sellers doing with their product images that you aren’t?
1) They pay extra attention to their main image
Top sellers understand that the main image is more than just a pretty picture; it’s the sales hook. It needs to instantly communicate your product’s unique selling point (USP), and do it without breaking Amazon’s strict image guidelines.
Text overlays? Not allowed.
But here’s what smart sellers are doing instead:
- Integrating Info into the Packaging
- Example- The packaging itself, like “Himalayan Mountain Shilajit” printed on the label, so Amazon sees it as part of the product. Or they show the benefit visually: a super absorbent towel soaking up a mess, or a memory foam pillow compressing under a hand.

- Visually Showing Benefits – Sometimes, words aren’t necessary at all. You can show your USP directly through the imagery. Selling a super absorbent towel? Show it soaking up a puddle of water. Customers instantly get what makes your product different.
- Example- Show infuser in a teapot or mug, no words required.

- Showing the Product in Action – Lifestyle images are powerful. Show your product being used in a realistic, appealing setting. This allows potential buyers to visualize themselves using it.
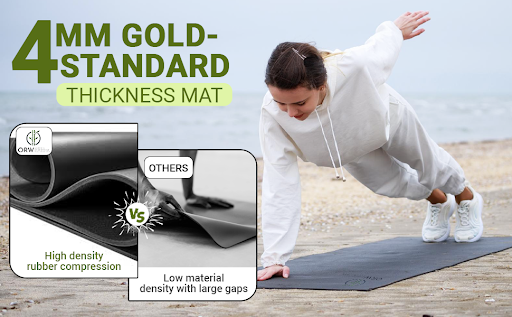
- Example: A yoga mat rolled out on a serene beach, highlighting its thickness and non-slip surface. It doesn’t just show the product, it sells an experience.
- Highlighting Product Features Without Text – Say your phone case is shockproof. Instead of text or badges, show the phone case being dropped, maybe with a bit of motion blur. The image says it all.
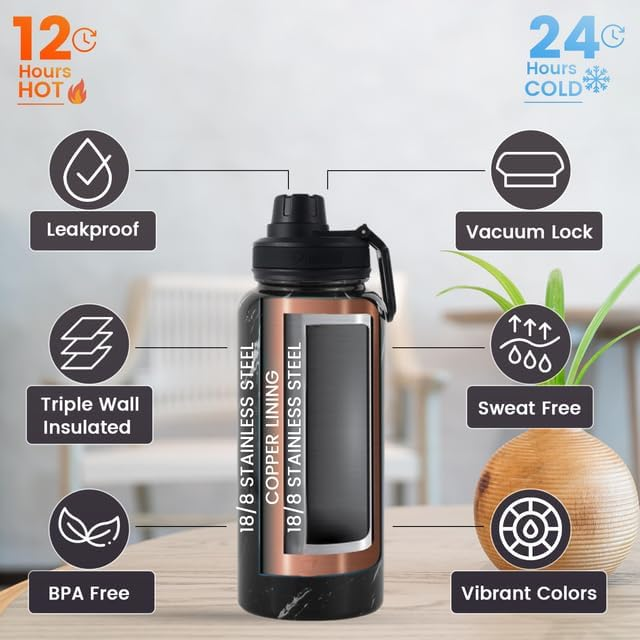
- Example: A stainless steel water bottle pictured with ice cubes and condensation conveys it keeps drinks cold for hours, visually reinforcing the message.
2) They test, tweak, and find the winning image
Top Amazon sellers don’t just settle for what “looks good.” They understand that testing is where the magic happens.
Amazon’s Manage Your Experiments tool allows you to A/B test different versions of your product content, main images, titles, bullet points, and even A+ content.
Here’s how it works:
- You upload two versions of the same asset (e.g., two different main images).
- Amazon randomly shows each version to different customers.
- Over time, Amazon collects data on clicks, conversions, and engagement.
- You get detailed insights on which version performs better.
What Can You Test?
- Angles and lighting
- Zoomed-in vs. zoomed-out product views
- Contextual lifestyle images vs. plain white backgrounds
- Products shown standing vs. angled
- With or without subtle shadows
Why Bother Testing?
Because the tiniest difference can yield massive results.
Imagine this: Version A is your current image. Version B is slightly angled, showing more depth. A test reveals that Version B generates 15% more clicks.
That’s 15% more shoppers landing on your product page, and potentially 15% more sales.
3) They optimize their image for mobile
Over 60% of Amazon customers shop from their mobile devices. That means your product images need to look incredible on small screens, or you’re losing sales.
Why does this matter?
Because mobile shoppers see less. Less text, fewer images, and less detail overall. So your images need to be more impactful, more informative, and more scroll-stopping.
How to Optimize for Mobile:
- Check Readability: If you use Amazon product infographics images, make sure the text is bold, large, and legible. If users can’t read it on mobile, it’s wasted space.
- Prioritize Your Main Image: It’s the first thing mobile shoppers see, often taking up the whole screen. Make sure it’s crystal clear and compelling.
- Use High-Resolution Zoomable Images: Let customers pinch and zoom to see texture, quality, and details. That tactile experience helps build trust.
- Stick to Simple Backgrounds: A cluttered image that looks “okay” on a desktop may turn into a confusing mess on mobile. Clean, white backgrounds or minimal lifestyle setups keep the focus on the product.
Pro Tip:
Open your Amazon listing on a smartphone. Is your main image still sharp? Can you read any text in Amazon product infographics? Do you get a full understanding of the product in just a few seconds?
If not, it’s time to revise and test again.
4) They invest in creating 3D-rendered images
Yes, this requires a bit more budget. But 3D-rendered images are quickly becoming the gold standard for top-tier listings.
These aren’t just fancy graphics. They create a virtual experience, allowing customers to see every angle, detail, and component, making them feel like they’ve held the product in their hands.
Why 3D Rendering Works:
- Perfect Lighting and Composition: Control every element, shadows, reflections, and color balance. Your product always looks its best.
- Highlight Intricate Features: Complex products (like tech gadgets, ergonomic furniture, or multifunction kitchen tools) benefit from 3D visualization, helping shoppers understand what makes them special.
- Easily Create Variations: Want to show different colors or configurations? No need for another photoshoot, just adjust the render.
Real-World Examples:
- A Bluetooth speaker brand saw a 20% increase in sales after using 3D renders to show every angle and internal components, boosting perceived value.
- A beauty company used 3D images to show serum texture, dispenser function, and lighting effects, building confidence in the product’s quality and results.
And the ROI?
You save money over time.
- No reshoots if Amazon updates its image policies.
- Easily adjust angles or create seasonal variations.
- Reuse across ads, social media, emails, and websites.
Budget-Friendly Tip:
Start with your hero image, the one shot that appears first in search results. Add one or two more (a lifestyle render and a detail close-up), and you’ve instantly upgraded your listing without a huge cost.
5) They team up with the pros
Top sellers know when to DIY and when to call in the experts.
From professional photographers and graphic designers to 3D render specialists and Amazon image optimization agencies, investing in high-quality help often yields a better return on investment than trying to piece it together yourself.
Professionals understand Amazon’s guidelines, shopper psychology, and visual storytelling. They help you create visuals that are not only beautiful but also strategically persuasive.
Final Takeaway
You don’t need the biggest budget. You just need the right strategy.
Prioritize your hero shot, know where you DIY, and invest where it counts. Because great images don’t just show a product, they sell it.


