


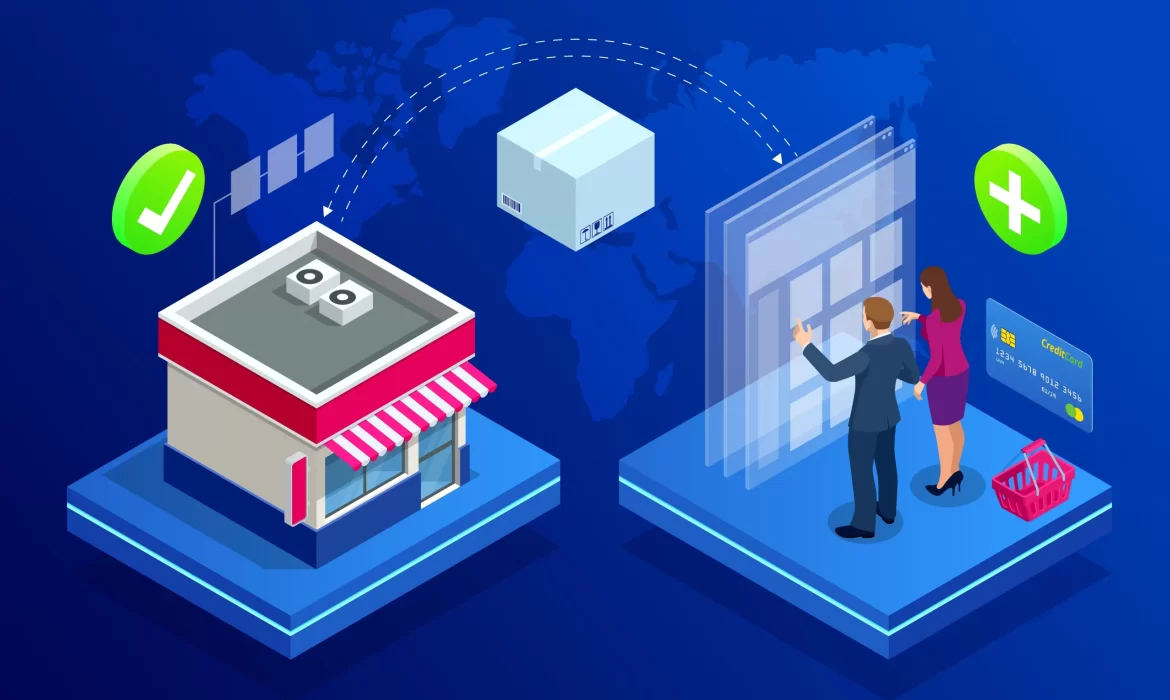
Getting new customers is great, but making those shoppers into lifetime converted buyers is what drives sustainable growth on Amazon. Sellers often get obsessed with selling or acquiring customers and forget the value of holding them as existing customers. But in fact, repeat customers provide more lifetime value, better reviews, and more brand advocates.
That is where Amazon loyalty programs & customer retention strategies come into play as game changers. This strengthens the relationship with his customer and generates long-term profitability, since it allows the seller to create a memorable experience that will help him/her to obtain repeated purchases over time.
Competition on Amazon is becoming more fierce day by day, for almost all categories. Over time, advertising gets more expensive, and focusing exclusively on new customers can be prohibitively costly to maintain.
Advantages of Building a Base of Repeat Customers on Amazon
Your business becomes more resilient and profitable when people continuously use your products at the exclusion of others.
Amazon owns part of the customer relationship, unlike where an eCommerce website usually controls it. Despite this, sellers still have plenty of opportunities to promote loyalty and encourage repeat purchases.
The point-based reward systems are not limited to Amazon loyalty programs. These can involve strategies that include:
The intention is to deliver memorable moments extremely well, encouraging customers to come back whenever they need similar types of merchandise.
Deliver Exceptional Product Quality
If you want to cultivate Amazon brand loyalty, it starts with the product. Bad quality can never be compensated by a marketing strategy.
Ensure your products:
When customers buy your products in good faith, they repeat purchases.
Create a Strong Brand Presence
Customer retention relies heavily on brand recognition. Enhanced brand tools allow sellers who are registered in the Amazon Brand Registry to differentiate themselves from competitors.
Focus on:
An identifiable brand makes customers want to come back and purchase your products again at a later date.
Use Subscribe & Save
For subscription and replenishable units, Subscribe & Save can be among the most powerful retention tools.
Customers get frequent deliveries and discounts – sellers get predictable revenue and superior Amazon customer retention.
Here are products that you may commonly use Subscribe & Save for:
It allows repeat orders to be easy and automatic.
Optimize Product Listings
The first time gives them the confidence to start over because that is meeting expectations.
Improve listing performance through:
Creating less confusion pre- purchase generally results in a better post-purchase experience.
Effective Inventory Management
The last thing loyal customers want to hear is that the product is out of stock.
Regular monitoring of stock availability will help avoid stockouts and also ensure that customers can purchase the products they are seeking.
Trust is reinforced by the reliable availability of your data, which also enables retention efforts over a long period.
Focus on Customer Feedback
Reviews, of course, are a great source of what customer expectations and pain points are.
Analyze recurring feedback to:
By continuously improving, it shows commitment to customer satisfaction; and in turn this encourages repeat business.

Amazon Brand Follow
Shoppers can follow brands they like on Amazon. Information on New launches, Discounts, and offers is received by followers.
This opens up extra avenues to have regular visibility and build customer relationships with current clients.
Amazon Posts
Amazon Posts works like social media-type content within the Amazon ecosystem.
Regular posting helps:
Being visible consistently plays an important role in Amazon brand loyalty.
Exclusive Promotions
Strategic discounts can drive customers to come back and purchase more.
Consider offering:
If they are prepared in a thoughtful manner, promotions can drive both sales growth and customer loyalty.
Explore More: Everything You Should Know About Amazon Customer Experience Metrics
Common mistakes that every seller makes are a blind spot, and many of them unknowingly dilute customer loyalty.
Common issues include:
Resolving these issues can enhance Amazon customer retention tremendously and boost repeat purchase rates.
Key Takeaways
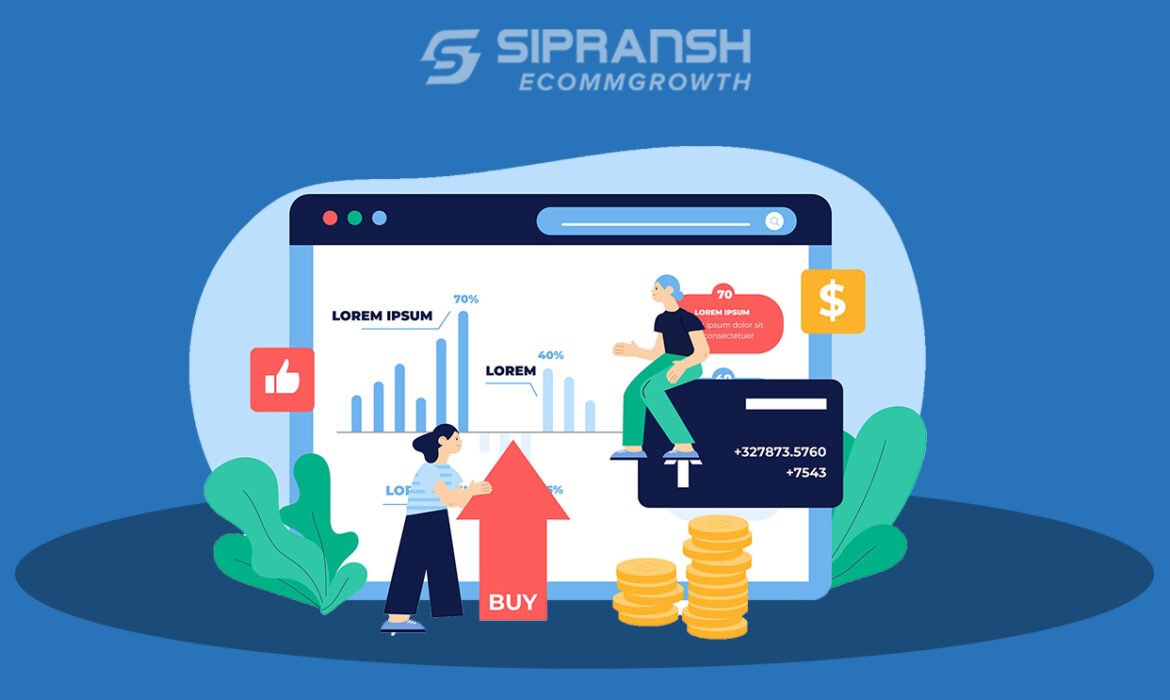
While drawing customers through the door is one side of the coin, keep in mind that success on Amazon also relies heavily on bringing buyers back. Sellers who focus on retaining customers generate better lifetime value and improved profitability without investing much in expensive acquisition campaigns.
Focusing on aspects like product quality, customer experience, branding, and Amazon engagement tools can solidify Amazon brand loyalty, building a base of reliable repeat customers on Amazon. These efforts gradually help you build durable growth and better market positioning.
Looking to boost repeat purchases and loyalty on Amazon? At Sipransh Ecommgrowth, our team works on data-backed customer retention strategies, brand presence optimization, and long-term marketplace success. Get in touch with us today to begin converting first-time buyers into loyal customers.

Driving traffic to your product page on Amazon is only the beginning of the puzzle. Getting them to buy is the real trick. There is a lot of competition between products and sellers, and basic descriptions and images simply do not suffice anymore. This is where Amazon A+ content templates fit in.
With A+ Content, brands can create fuller product pages that display features and benefits while bringing brand identity to life visually. With proper implementation, these improved content formats can increase buyer trust, engagement, and impulse conversion for listings.
Amazon A+ Content is designed for brand-registered sellers to provide enhancements over standard product descriptions through rich visuals, charts and graphs, branded storytelling, and detailed feature sections. This type of listing, formerly called Enhanced Brand Content (EBC), allows brands to display more professional, informative offerings.
Most successful sellers today utilize Amazon enhanced brand content templates to display information in a format that makes it easier for shoppers to digest. Sellers have also utilized brochure styles, as this enabled them to explain the product benefits visually instead of over-relying on long descriptions whilst answering common customer concerns.
A+ Content serves several purposes:
To help boost conversion rates, a lot of brands would say good A+ Content is worth the investment.
Online shoppers cannot feel, play with, or inspect products before the purchase. As a result, they rely greatly on the product pages available.
Well-made A+ Content helps close that gap with well-written and engaging product descriptions. It helps brands respond and deliver answers before customers even ask them, with reduced ambiguity during the buying process.
Some key benefits include:
In order to see how visuals, layouts, and messaging impact purchasing decisions, many brands do their homework by examining successful A+ content examples. The best pages take shoppers on a natural progression from learning about a product to the purchase.
Explore More: Everything A Seller Should Know About Amazon A+ Content
Not all templates yield the same result. The correct layout varies based on your product category and what the consumer demands.
Brand Story Template
Brand Story module allows sellers to explain their mission, values, and product philosophy.
This template works well for people who:
It is widely known that customers connect more with brands that open up and share their story, so this template can be used to build trust.
Feature Highlight Template
A very popular Amazon A+ content template is to include product photos and concise descriptions of important features.
This format allows sellers to:
Because the information is visually arranged, shoppers are able to absorb key details quickly.
Product Comparison Chart Template
Comparison Charts: These are among the most powerful Amazon EBC templates you can get.
These modules allow customers to compare several products within the same brand and choose what suits their needs.
Benefits include:
Comparison charts are particularly effective for companies with multiple variants or complementary products.
Lifestyle Image Template
The lifestyle module features imagery in the real world showing products being used.
These templates are designed less to show the product and more to help customers picture what it looks like when owned and used.
They work exceptionally well for:
Lifestyle images establish emotional hooks and show utility.
Benefits-Focused Template
A few products are fixing several customer problems. For these situations, a template that focuses on benefits can work wonders.
Each division punctuates a specific advantage, like:
It keeps your content organized and focuses on what customers value most.
Technical Specifications Template
More complex product features usually must be explained in greater detail.
This template works well for:
Most high-end Amazon enhanced brand content templates merge the technical specifications with graphics to keep information fun and interactive.

No template can perform poorly if it is not implemented well. To maximize results:
Focus on Customer Benefits
Describe how the features improve the customer experience rather than just write some list of features.
Use High-Quality Visuals
This improves your credibility and helps in laying out a premium shopping experience for customers.
Keep Content Easy to Scan
Keep copy short, headings clear, and use visual hierarchy — make the information easier to consume.
Maintain Consistent Branding
They need to offer an experience that is cohesive with your colors, fonts, images, and messaging.
Learn From Successful Examples
Learn through research of proven A+ content examples, layout options, storytelling methods, and design choices that prioritize conversion rate optimization.
Helpful resources for Amazon A+ Content allow sellers to create visually stunning shopping experiences by turning a plain product page into something special. With the correct Amazon enhanced brand content templates, brands are able to communicate values efficiently, deliver answers to consumers, and establish credibility. Whether in comparison charts, feature highlight snippets, lifestyle images, or brand storytelling pieces, A+ Content assists shoppers in determining how to buy. By using successful layouts and learning from A+ content examples, businesses can improve listing performance and conversion rates.
Sipransh Ecommgrowth creates Amazon listings that sell, A+ Content that converts, and marketplace growth strategies with measurable results. From professionally designed Amazon A+ content templates to an entire listing optimization strategy, our team is trained to convert more visitors into loyal customers. Get in touch with us today to make the most out of your Amazon listings.

In the ever-evolving eCommerce era, many sellers are looking to eliminate dependence on just a single platform. They are leaning towards diversified revenue streams. One of the most attractive opportunities today is selling on Walmart Marketplace, a growing platform that opens your business to millions of shoppers throughout the country!
Sellers need to learn what the Walmart account registration requirements are and how you can register as a Walmart seller before listing products and generating sales. A good application can boost your chances of approval and get you up to speed selling sooner.
Even as one of the leading global marketplaces, increasing competition, growing advertising prices, and changing policies at Amazon lead sellers to consider moving to second channels instead. Here are some of the benefits that come with selling on Walmart Marketplace:
Walmart is a great opportunity for established Amazon sellers to expand their business and reach new customers.
Existing marketplaces often allow anyone to register and sell their products, whilst Walmart scrutinizes all sellers carefully to ensure they can provide an excellent quality shopping experience for its customers. Approval is primarily given to businesses with a history of selling and running online.
Here are the main Walmart account registration requirements:
By meeting these requirements, you show that your business can sustain the standards maintained by Walmart in terms of customer satisfaction and order fulfillment.

If you want to save time during the process, keep your paperwork handy ( or get as much of it ready ahead of time ) before you begin filling out your registration application.
Typically, sellers should prepare:
Business Information
Contact Information
eCommerce Performance Data
Product Information
Correct and complete information is crucial to avoid delays during the review step.
Step 1: Complete the Application
Go to the Walmart Marketplace page and enter your information about your business, tax details, product categories, and operational details.
Step 2: Business Verification
Walmart evaluates your information and checks your business. The confirmation stage // Depending on this, you confirm the information about your taxes and whether you’re doing legitimate business.
Step 3: Marketplace Approval
If it gets approved, you will receive a notification and access to your Walmart seller center account.
Step 4: Account Setup
Configure shipping settings, Payment methods, Fulfillment methods, and return policies.
Step 5: Product Listing
Apply product content optimizations and prepare your listings for launch by uploading your catalog.
Learning how to register for Walmart Marketplace in advance minimizes errors and enhances the onboarding experience as a whole.

Sometimes even experienced Amazon sellers also get rejected if they do not meet Walmart’s standards.
Some common reasons include:
To avoid such blunders and improve the chances of approval, you should carefully review the Walmart seller requirements before applying.
Read More: Selling on Amazon and want to sell on Walmart? Here’s what you should know
As soon as they get approval, sellers tend to get a little complacent, thinking that they have done their job, but the fact is that maintaining Walmart’s performance standards requires ongoing work and diligence.
Best practices include:
Selling on Walmart Marketplace isn’t just limited to getting approval but also creating a sustainable customer experience over time.
Amazon sellers usually start with an edge because they already know how to manage inventory, customer service, and the ins-and-outs of marketplace function. When executed properly, these skills can play a huge role in establishing profitability on Walmart while diversifying risk beyond a single sales channel.
Expanding beyond Amazon opens up new avenues for growth as well as diversifying a seller’s strategy with multi-channel sales. But it first starts with knowing and adhering to Walmart’s registration guidelines. Through diligent steps such as preparing business information, checking eligibility, and completing all necessary documents to meet the Walmart account registration process, it also helps sellers boost their chances of being approved when figuring out how to register for Walmart Marketplace. If planned well and executed successfully, selling on Walmart Marketplace can represent a sustainable source of long-term revenue growth.
Handling approvals, listings, and optimizing the marketplace can be a daunting task without qualified professionals. Sipransh Ecommgrowth is a trusted company that removes the guesswork from growing your business, simplifying the road to success across multiple online sales channels. Reach out to us now to establish a profitable business on Walmart Marketplace.

As an Amazon seller who wants to connect your store via third-party tools or services, the first thing you would require is your Amazon merchant token. Widely searched by sellers for how to find merchant token Amazon, the actual process is very simple when you know just where to look.
With this guide, we will help you with everything in a clear, step-wise manner so that you can easily find your token and make use of it without any confusion.
An Amazon merchant token is a unique identification for your seller account on Amazon. This is mainly used when connecting your store with third-party tools or any external tools, APIs, and other software.
That token allows Amazon to verify your account during data exchange. It serves a more technical purpose while it is linked to your Amazon seller ID, especially for backend integrations.
If you rely on tools or automation, your Seller Central merchant token is an important part of keeping your Amazon business running.
Here’s why it matters:
Several advanced tools and systems fail to work properly without an Amazon merchant token.
Take these simple steps to find the Amazon merchant token:
Step 1: Log in to the Seller Central Account
Log in to your Amazon Seller Central account by entering your credentials.
Step 2: Click on Settings
Click the Settings gear in the top-right corner of your dashboard.
Step 3: Select “Account Info”
Select Account Info from the dropdown.
Step 4: Go to the Business Information
Look for the Business Information section by scrolling down.
Step 5: Click On Merchant Token
On the Business Information page, click on Merchant Token to display your token.
Your Seller Central Merchant Token appears here. All you need to do is copy and use it wherever needed for integrations or tools.
The Amazon Seller ID is NOT the same as your Amazon Merchant Token, although both are associated with your seller account.
Merchant token is primarily used for integrations and API control, and seller ID serves as a public identifier that may show up in your store URLs and product titles.
Both are identifiers for your account, but used differently. So, when you configure tools or services, never mistake your Seller Central merchant token with your Seller ID.
The process is very simple and self-descriptive, but some sellers still have problems finding their Amazon merchant token. Here are a few quick tips:
If you still have trouble, Amazon Seller Support will be able to assist.
Once you find your merchant token, Amazon, it’s crucial to use it safely and accurately.
Keep It Secure
The merchant token is confidential information. Do not post it publicly or on untrusted platforms.
Use Trusted Tools
Link your account only with trustworthy software providers.
Save It Safely
Save your token in a safe place so that you can find it easily when you need it.
Manage Access
If your account is managed by more than one team member, restrict access to your Seller Central merchant token.
The following are the most common situations when your Amazon merchant token is required:
Ensuring quick access to your token makes things run smoother with less disruption.
Read More: New features for Fulfillment by Merchant sellers
Many sellers make some mistakes when finding Amazon merchant tokens, which may result in confusion.
Here are a few common mistakes that sellers must avoid:
Avoiding these mistakes saves you time and prevents further problems.
Finding your Amazon merchant token is not tricky if the right steps are taken. The process is pretty simple:
Settings→Account Info→Business Information→Merchant Token
After finding it, keep it safe and only use it with trusted tools. When you understand these fundamentals, managing your Amazon store becomes easier and less time-consuming.
The key to success on Amazon is a tailored strategy, optimized listings, and constant expert support.
To help you grow your business on Amazon, Sipransh Ecommgrowth is here to provide the right solutions to scale faster, from account management to performance optimization. Get in touch with us today to expand your business now!
If you’ve been seeking a way to make money from Amazon, then you’ve likely discovered the two most popular options: Amazon Associates and Amazon Storefronts. While both can be potent monetization tools, they have completely different goals. Knowing the difference between these two is important for selecting what works best for your business or personal brand.
In this guide, we will walk you through Amazon Associates vs Amazon Storefront, how each functions, and guide you to choose which one aligns better with your goals.
One of the largest affiliate marketing programs in the world is the Amazon Associates program. It was designed to help individuals, bloggers, influencers, and website owners earn commissions on the sale of Amazon products they promote.
Here’s how it works:
The model is easy and flexible, and you do not own or manage any product. Great for content creators who want to monetise traffic.
An Amazon Storefront is a customizable page that an Amazon seller or influencer can create to highlight products and related content. There are two main types:
Even though your affiliate links are not limited to a platform, the storefront is like a mini-website on Amazon with one-click shopping.
An Amazon affiliate storefront is generally used by influencers when they mix affiliate marketing with a shopping hub.
Differences can be summed up as structure, purpose and user experience when comparing amazon associates vs amazon storefront.
1. Monetization Style
While Amazon Associates is mainly link-based, storefronts are more about building a brand and curated collections of products.
2. User Experience
Having a storefront presents a smoother, more interactive experience (particularly for influencers).
3. Customization
Storefronts give you much more creative control over your branding if that matters to you.
4. Target Audience
This distinction is quite significant when determining whether Amazon associates the same as Amazon storefront because they each provide value to different user types.
5. Traffic Strategy
Storefronts are especially potent for app partners who are creators on Instagram, YouTube, and TikTok.
They are NOT the same.
Though both allow you to make commissions, they work in different ways.
Many influencers use both at the same time. Their storefront is the front of the operation, while Amazon Associates is what fuels the affiliate earnings magic behind the stage.
While they are connected, they are not the same.
It is the quickest way to earn money online. Here’s why:
The Amazon Storefront provides a more sophisticated, brand-oriented direction.
Choose Amazon Associates if:
For most new entrants, this is the ideal first step.
If you are answering yes to the points below, then go for an Amazon Storefront:
Primarily, an Amazon affiliate store is very effective for influencers to easily recommend stuff.
Read More: Step By Step Guide To Create An Attractive Amazon Storefront
Yes, and this is where it gets strong. Many successful creators mix around those models:
This combined approach aims to do the best at enhancing both visibility and conversions.
When researching amazon associates vs amazon storefront, it is not about picking one or the other—it is how to best leverage both.
Treating Them as the Same
Some beginners think both tools are the same; these are different tools.
Not Optimizing Storefront Layout
A messy storefront leads to fewer conversions.
Ignoring Audience Intent
Your strategy should depend on the source where the user comes from—either SEO or social media.
Overloading with Products
For curation, quality always trumps quantity.
Looking for experts to grow your Amazon audience and revenue? Sipransh Ecommgrowth is an agency for sellers, brands, and creators that specializes in building high-converting Amazon strategies ranging from storefront optimization to affiliate growth.
So take your Amazon journey to the next level with Sipransh Ecommgrowth and start making consistent revenue from clicks.
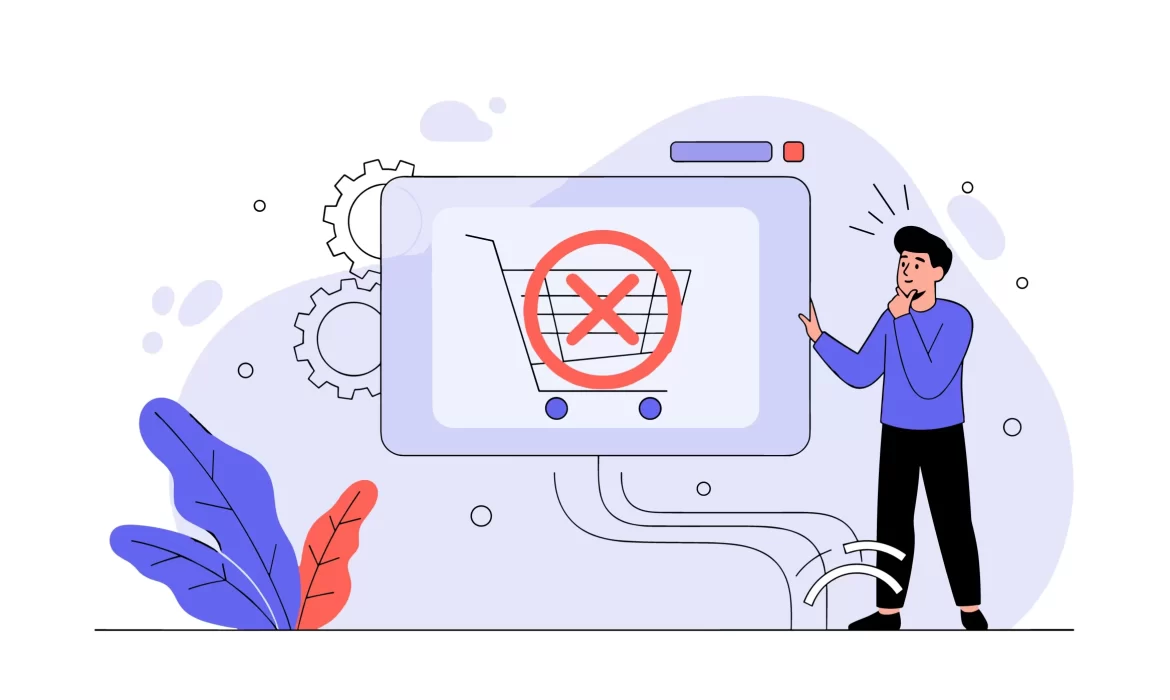
As an Amazon seller, watching your “Currently Unavailable” product can be infuriating — and expensive. This is a problem that has a direct impact on the visibility of your product offerings, conversions, and finally, your revenue. This may be more common than you think, and whether you are new to selling or have been at it for a while, you need to know why this happens.
This guide will help you understand the common reasons for the Amazon listing “currently unavailable” status and their practical solutions.
Read More: How to Create Amazon Listings That Rank and Sell
Your product shows as unavailable, which means the customer cannot buy it at that time. However, this is not always an apparent cause. For sellers, the question of why my Amazon listing is unavailable usually has many answers, since it goes from problems with your inventory to errors in the backend.
1. Out-of-Stock Inventory
A stockout is one of the most common causes for an ” Amazon listing currently unavailable” message. When your inventory reaches zero, Amazon disables the Add to Cart button on its own.
Even a temporary stockout can affect your ranking and sales velocity.
2. Suppressed or Inactive Listings
Amazon maintains strict listing standards. Without critical details such as images, bullet points, or descriptions, your product may end up getting suppressed.
This category of Amazon listing issues can result in your product not being visible or available to buyers until corrected.
3. Pricing Errors
If your listing is inactive due to violating Amazon’s fair pricing policy in this area, Amazon will notify you separately because improper pricing could put your listing on hold. If prices are well above or far below the market, it can trigger suppression.
To avoid this kind of issue, you need to keep your pricing stable and even.
4. Missing Product Data
Oftentimes, the problem is technical rather than strategy-based. If there are price or quantity fields missing, your listing will automatically be listed as unavailable.
It is a recurring Amazon listing problem that many sellers face, particularly those who are new to the platform, who don’t really pay attention to it.
5. Fulfillment or Shipping Problems
A misconfigured shipping setup can block customers from making a purchase for your product. Common causes include:
This works by using machine-learning algorithms to identify the stock that Amazon cannot fulfill and marking it as unavailable instead.
6. Account Health Issues
Your seller account counts heavily on the reach of your listings. Listing restrictions can be attributed to poor performance metrics, policy infractions, or open complaint cases.
Flagged Amazon accounts can directly lead to an inactive status.
7. Buy Box Suppression
A product can be active, but as long as the Buy Box is missing, it will not appear to be in stock.
This often happens due to:
If you are searching for “why is my Amazon listing unavailable,” then Buy Box suppression could be the answer that hides around.
8. Listing Processing Delays
If you just created or updated your listing, then Amazon may be processing it. Having said that, your listing may appear unavailable during this time frame.
This usually settles down within 24 hours.
Now that you know the causes, let’s explore how to troubleshoot if your Amazon listing is unavailable.
Step 1: Check Inventory
Log in to your inventory dashboard and check if you have stock.
This is perhaps the fastest solution.
Step 2: Review Listing Status
Check if your listing is:
Add missing elements such as images, descriptions & bullet points to solve the Amazon listing problem.
Step 3: Update Pricing
Coherently price your product per Amazon’s practices and stay competitive. Do not change prices abruptly or more severely.
Step 4: Complete Product Information
Review all listing fields, including:
Minor incomplete data can make your listing inactive.
Step 5: Verify Shipping Settings
Ensure that you will be able to serve your product to your audience.
Step 6: Monitor Account Health
Go to your account health dashboard and resolve any warnings and violations. Where seller performance improves, it protects against listing issues.
Step 7: Refresh the Listing
In some cases, editing and saving your listing is all you need to do for temporary glitches. This solves the unavailability issue in the Amazon listing as a result of backend errors.
Step 8: Allow Processing Time
Allow some time for Amazon to process your new listing. Multiple rapid changes will delay updates!
Here are some tips to avoid facing an “Amazon listing is currently unavailable” status again.
It is always easier to prevent than to fix.
Avoid letting listing problems stop you. At Sipransh Ecommgrowth, we can resolve various seller challenges and also aid sellers not just in optimizing their listings, but also help them scale in their Amazon growth.
So what are you waiting for? Start today and make a profit by fixing every “unavailable Amazon listing problem” with Sipransh Ecommgrowth!

If you are entering the Amazon monetization game, then you have probably come across both Amazon Affiliate and Amazon Associate. These two appear to be completely different programs at first glance. But are they really?
Knowing the difference—or the similarity—can save you time and confusion, and even help you create a more efficient online income plan. This blog is all about Amazon affiliate vs. Amazon associate, how the system works, and what exactly these terms mean.
Amazon Associates program is the official affiliate marketing platform by Amazon. It provides a platform for people, including bloggers, influencers, and website owners, to generate commissions by promoting Amazon products using their unique referring link.
Here’s how it works:
One of the most popular affiliate systems is the Amazon Associates program, which has been around since 1996 due to the huge variety of products as well as brand reliability.
The Amazon Affiliate Program is a program that allows you to earn money by promoting any product in the world and earning a commission on it.
But here is where things really get interesting. The Amazon affiliate program is often used interchangeably with the Amazon Associates program. In reality, they are the same thing.
Now, when people mention joining the Amazon affiliate program, they actually mean to say the Amazon Associates program.
You do not have a distinct system, dashboard, or structure, just the same program termed in two different ways.
So, that leads us to our main question: Amazon affiliate vs Amazon associate — is there any real difference?
The answer is “NO.”
They are synonyms of the same program:
While comparing Amazon affiliate and Amazon associate, we need to understand that the word “affiliate” is a generic term in the online marketing industry, whereas associate is Amazon’s branded terminology.
Thus, when someone says they are an Amazon affiliate or Amazon associate, it really means the same thing—making commissions from promoting Amazon products.
So, to go deeper into the topic, let us also explain what an Amazon affiliate means.
Someone who is an Amazon affiliate,
It is performance-based marketing, and you earn only if your referral makes a sale.
This model benefits both parties:
This confusion regarding Amazon affiliate vs. Amazon associate is mainly due to the way online users use language.
Here are a few reasons why:
1. Industry Terminology vs Brand Terminology
Affiliate marketing is a general term; therefore, they say “Amazon affiliate.” In reality, Amazon refers to its users as “Associates” officially.
2. Content Creators Simplify Language
Affiliate is used by many bloggers and YouTubers because it makes sense to the average user, especially just starting out.
3. Search Behavior
Typically, general users search for “amazon affiliate program” rather than “amazon associates program.”
This Amazon Associates program is well-suited for:
This is an incredibly powerful monetization tool if you create content that drives purchasing behavior.
Read More: Top 5 Amazon Marketing Strategies
Pros
Cons
However, regardless of the limitations, this Amazon affiliate program is still almost one of the best entry ways into affiliate marketing.
Myth 1: They are Separate Programs
As mentioned above, Amazon affiliate vs. Amazon associate is a term difference.
Myth 2: One Forwards Pay More Than the Other
Since both reference the same system, they have an identical payout structure.
Myth 3: Affiliates and Associates Have Distinct Tools
Everyone uses the same dashboard, links, and reporting tools.
Here are a few tips if you want to join the Amazon affiliate program:
If you are serious about growing your affiliate income and building a strong presence on Amazon, you don’t have to do it all by yourself.
Sipransh Ecommgrowth is here to help sellers and affiliates reach their peak potential with expert strategies, optimized listings, and data-driven growth solutions.
Now is the right time to take action – whether you are just starting or looking to boost conversions.
Join hands with Sipransh Ecommgrowth and transform your Amazon journey into a revenue-generating powerhouse.
Selling on Amazon requires selecting between Fulfilled by Amazon (FBA) or Fulfilled by Merchant (FBM). Yes, FBA puts you in the limelight, but there are more than a few situations where FBM is not only viable, it could be a well-considered choice.
In our guide below, we will cover when FBM makes sense and help give you ideas for how to incorporate it into your business. If you’ve been trying to decide between FBM vs FBA, this post is a huge factor in thinking through at least one component of that decision.
Fulfilled by merchant Amazon (FBM), where you do all the storage, packing, and trucking, plus customer service yourself (or with help from a third-party logistics partner). With FBM, you do everything yourself (unlike FBA, where Amazon handles fulfillment).
This model is favored by most Amazon FBM sellers because it provides more independence, cost control, and flexibility than relying on Amazon’s handling network.
But before we get into when FBM makes sense, it helps if we have the core differences clear.
While FBA includes ease of use and Prime eligibility, it also incurs storage fees, fulfillment expenses, and tight operational control. In contrast, FBM may be cheaper if it is used in the proper situations.
Read More: Tips for reducing your Amazon FBA fees

Now, let’s explore and break down the key circumstances in which FBM is better.
1. When You Sell Low-Margin Products
For products with small profit margins, FBA fees can be bad news in no time. This includes storage costs, fulfilment fees, and long-term storage fees.
FBM makes sense in such cases, as you are able to save on overhead costs because fulfillment is done individually by yourself. This can be particularly advantageous for sellers with business models characterized by high volume but low margins.
2. When Your Products Are Bulky Or Heavy
FBA charges high fees to store and ship oversized or bulky products. These fees from Amazon can eat into profits significantly.
With FBM, you can:
FBM often ends up being the more viable solution for large-item sellers.
3. When You Have a Logistics Setup Already
If you already operate a warehouse or have an established 3PL partner in place, FBM may be the next logical step for your operations.
This approach is preferred by most of the seasoned Amazon FBM sellers because;
4. When You Want More Control Over Customer Experience
FBA also controls a great deal of packaging, branding, and customer experience. FBM allows you to have a much more bespoke solution.
This includes:
If you want to build a strong brand identity, FBM gives you the flexibility to do so.
5. When You Are Selling Seasonal or Slow-Moving Items
Well, Amazon FBA levies long-term storage fees if your inventory sits idle for too long. Considering your products have seasonal demand or if you sell new items that may not give steady sales, then holding stock at an Amazon warehouse can be a risk.
FBM allows you to:
This is probably one of the biggest reasons seasonal sellers start to realize when FBM makes sense.
6. When Inventory Flexibility Is Critical
With FBA, you need to ship your inventory ahead of time, which can lock up cash and complicate forecasting.
With FBM:
This is particularly beneficial for new sellers or those dabbling in additional product categories.
7. If You Are Selling Customized or Made-to-Order Products
FBM is often the only viable option if your products need to be customized, personalized, or made-to-order.
FBA is for your inventory that can be shipped out, and FBM provides you with:
FBM is well-suited to this and makes it perfect for niche and handcrafted products.
8. When You Do Not Want FBA Restrictions
Amazon FBA has an array of do’s and don’ts:
In order to overcome these constraints and have the operational freedom, many amazon FBM sellers are opting for FBM.
Explore More: Guide, Strategies & Everything A Seller Should Know About Amazon FBA Reimbursement
9. When You Can Provide Competitive Shipping
One of the biggest benefits of FBA is prime shipping. But if you can meet or get close to those delivery times, FBM is a serious competitor.
With efficient logistics, you can:
Ideally, in this case, the FBM vs FBA argument mostly supports FBM.
FBM provides some clear advantages, but it is not without challenges.
1. Shipping Responsibility
You’re responsible for timely delivery. Seller metrics are negatively affected by delays.
Tip: Collaborate with trustworthy carriers and examine the shipping supply chain.
2. Customer Service Management
Returns and customer-related queries can keep you occupied all the time.
Tip: Implement customer service tools or outsource your support
3. No Automatic Prime Badge
FBM listings do not automatically qualify for Prime.
Tip: For those who qualify, Amazon recommends Seller Fulfilled Prime (SFP)
Some of the most successful sellers don’t go one way or another, they choose both ways.
A hybrid strategy might include:
This method enables you to optimize productivity with minimum expenditure.
If you’re still working through whether or not FBM is a good fit for your business, or how to successfully make it happen, book a call with consulting experts at Sipransh Ecommgrowth.
Let’s discuss the challenges you’re facing right now. Trust us to build a tailored strategy that really works with your business goals.
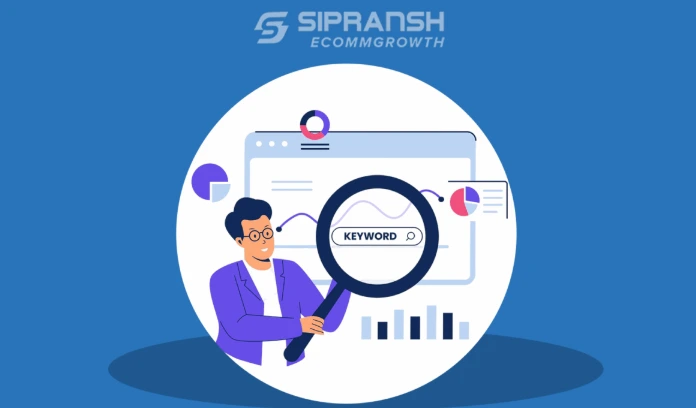
As an Amazon seller, if you have ever tried to improve your product visibility, one question constantly pops into your mind: how many keywords is Amazon allowing?
The platform doesn’t limit keywords by count but by space and structure. Understanding keyword limits in different listing areas (and how to make the best use of that space) is key to success for any seller.
This Amazon keyword limitation guide will take you through understanding backend fields and help optimize listings by eliminating wasteful use of precious keyword space.
Amazon’s algorithm matches your products with what customers are searching for based on keywords. Strong Amazon listing keywords can:
But Amazon ranks its search based on relevance and performance rather than the number of keywords used. Simply adding more keywords to your copy will not ensure the results are better.
So, let’s discuss a big question: how many keywords can you use on Amazon?
From a technical standpoint, Amazon does not impose a hard limit on the number of keywords allowed. It limits the overall character or byte count in certain fields, notably backend search terms, rather than individual words.
This means your focus needs to be on how you can best utilize the space granted and not try to squeeze as many keywords as possible.
The main restriction that sellers should be aware of is the Amazon backend keyword limitations.
Amazon has a hidden field in Seller Central that allows you to add extra keywords that will never see the light of day on your product page. We call these backend search terms.
Key Rule:
As a thumb rule, this means that you can usually add anywhere between 20 and 40 keywords as long as they’re short enough.
If you go beyond the limit, Amazon can ignore the whole field, damaging the discoverability of your product.
Read More: Keyword research techniques for Amazon sellers

While the backend field has a hard cap, other listing sections will also impact keyword optimization. There are guidelines for every section.
1. Product Title
2. Bullet Points
3. Product Description
4. Backend Search Terms
That is why it is important to combine all these segments together in order to have a solid keyword strategy.
Rather than putting an emphasis solely on how many keywords Amazon allows, think in terms of keyword quality and coverage.
A balanced strategy might include:
The focus is to optimize various methods customers search for your product without repeating the same terms.

If you ignore the Amazon keyword limit, there can be a few complications:
1. Ignored Keywords
If your backend exceeds the limit, Amazon might disregard all of your backend keywords.
2. Reduced Relevance
Incorporating excessive irrelevant keywords may mislead the algorithm and dampen your ranking positions.
3. Poor User Experience
Using keyword stuffing makes the listing difficult to read, which can ultimately lead to fewer conversions.
4. Wasted Space
The efficiency of your listing is compromised due to redundancy in keywords and unnecessary words.
To sum up, more is not better; only kindness works when there is precision.
To maximize the real estate you have, use these tested methods.
Avoid Repetition
Amazon does not need you to write keywords in various fields frequently. All that repeating a word after the first occurrence achieves is redundancy.
Use Space Instead of Punctuation
Use spaces instead of commas to separate keywords. This saves bytes and helps you fit more relevant terms into the Amazon backend keyword limit!
Skip Filler Words
Avoid words like:
They do not help in search performance and occupy space.
Include Synonyms
Different customers use different terms. For example:
Variations help improve reach without crossing thresholds.
Focus on Buyer Intent
Look for keywords that are representative of what customers are searching for (at the time they want to buy). This will improve both visibility and conversions.
Read More: Amazon Restricted Keyword List
Keywords on Amazon are surrounded by so many myths. Let’s clear up a few:
Myth 1: You Cannot Exceed the Maximum Limit
Filling every byte isn’t necessary. Relevant keywords matter over full utilization.
Myth 2: Only Backend Keywords Are Important
Backend keywords are, of course, important, but so is your visible content, which includes title, bullets, and description.
Myth 3: More Keywords Means Higher Ranking
Too many keywords or irrelevant words can harm performance.
For more than just keywords, Amazon’s search algorithm evaluates. It also considers:
Even highly optimized Amazon listing keywords still need great product images, pricing, and reviews to convert successfully.
Facing issues with ranking, converting, or scaling on Amazon? Sipransh Ecommgrowth is here for you! As a leading Amazon SPN Service Provider, we help sellers scale their businesses. Get in touch with us today to understand how we can help.

With the power of voice technology, a new wave is reshaping the shopping experience for how customers find and purchase products online. Whether it’s asking Alexa to recommend products or using a mobile assistant for instant search results, Amazon voice search is indeed not a thing of the future but part of the buying journey.
This means only one thing for the Amazon sellers, that you must adjust your strategy with the right voice search tools for Amazon sellers to be recognizable and keep a competitive edge to be profitable too.
In this blog, we will dissect the top-tier tools, how they operate, and how you can leverage them to conquer voice commerce.
Well, before we cut to the tools, you should know how voice search varies from traditional search.
Voice queries are:
While traditional search results can show a multitude to compete, voice assistants recommend just one product. Which means ranking matters even more.
That is the reason sellers have to change their way of using keywords and use Amazon SEO tools for conversational search behaviour.
Read More: Why Amazon Sellers Need to do Advertising?

Voice search is more than just a convenience, it’s about conversions.
In addition, voice commerce is also part of the bigger picture of a buying journey. For example, a voice Search will convert a customer into realization with the product, but complete the purchase later on another device.
Hence,it becomes a long-term growth strategy to invest in voice commerce tools rather than a short-term tactic.
We list below tools that help you optimize for voice-based discovery and conversions.
1. Amazon Brand Analytics
The analytics platform is one of the add-on facilities provided to sellers by Amazon.
Key Features:
Why it matters for voice:
This helps identify long-tail, conversational phrases that are reflective of realistic speech patterns vs. speech-to-text.
2. Helium 10
One of the popular tools used by Amazon sellers for keyword research and listing optimization.
Key Features:
Voice advantage:
You can uncover natural-language keywords and question-based queries with Helium 10, which makes it a more valuable tool for optimizing Amazon voice search.
3. Jungle Scout
Jungle Scout is a one-stop shop for product research and keyword tracking.
Key Features:
One of the best Amazon SEO tools for voice readiness that allows sellers to find high intent keywords and streamline listings.
4. Amazon Alexa Skills Kit (ASK)
It is a must-have tool for sellers who want to go beyond optimization and create voice experiences.
Key Features:
This becomes all the more important for brands wanting to crack voice commerce.
5. Google Dialogflow
A generative AI platform for generating the ideal conversational interface.
Key Features:
Dialogflow helps businesses create voice-driven interactions in line with modern shopping behavior.
6. Algolia Voice Search
Algolia delivers an AI-powered search with voice integration.
Key Features:
Particularly useful for sellers who are also selling on channels other than Amazon
7. Speechly
Speechly provides a real-time voice search and filter solution.
Key Features:
Many modern voice commerce experiences are geared toward conversational queries, and this system allows searching for products based on those.
8. Microsoft Azure Speech Services
An enterprise-grade voice recognition and AI integration tool.
Key Features:
This one is for bigger brands with a significant upgrade in voice commerce tech.
Simply having tools can only take you so far. Execution matters just as much.
Focus on Conversational Keywords
Natural language is what voice search depends on. Target phrases and questions as opposed to single keywords.
Voice assistants recommend products with the highest ratings more often.
Aim for “Amazon’s Choice”
Having this badge essentially means that you are more likely to make the cut when search results for voice searches are returned.
Add FAQ Content
Providing answers to common customer questions helps in becoming more visible with voice queries side-by-side coverage.
Read More: Amazon Customer Engagement Tool – How To Manage It & Maximize Its Usage?
Voice search optimization approach must focus on the strategic techniques as well as human-friendly content.
Voice commerce is set to grow at a steady pace. At least some shoppers use their voice nowadays – and as AI assistants get smarter, customers will continue turning to that medium to buy swiftly and easily.
And those who use voice search tools for Amazon sellers now will rule the marketplace in the years to come.
Wondering whether your listings are voice-search optimised? What is one product that you want to rank higher on Amazon? Reach out to Sipransh Ecommgrowth to discuss and get a quick, personalized insight to help improve visibility and conversions. As an Amazon SPN Service Provider, we will help you grow smarter with data-driven strategies for the future of e-commerce.

